For those who use Photoshop

Winemaking Talk - Winemaking Forum

Help Support Winemaking Talk - Winemaking Forum:

This site may earn a commission from merchant affiliate links, including eBay, Amazon, and others.

Joanie

Senior Member
Joined
Aug 15, 2006
Messages
2,291
Reaction score
1
Here's something I learned this weekend while fooling around. I thought this technique could make some interesting backgrounds for wine labels...hmm I'm thinking it could be used for text too!

Open up a photo or picture you like.

In the upper right of the Tools Palette there is the Rectangular Marquee tool. If you hold down the tiny little triangle in the lower right corner of that too you will get a drop down with other shapes. Choose the Single Column Marquee Tool and click inside your picture. It doesn't matter where.

Copy and past that selection into a new blank document. It will look like a very thin line.

Holding down the Ctrl key, press the letter T to transform your line. Pull on the side and corner boxes to stretch out the line so it looks the way you want.

Repeat that "paste" or take a new selection a couple more times rotating the layers after transforming them.

Leave the first layer at 100% opacity and each layer after about 25% less the the layer before. That way they will show through each other.

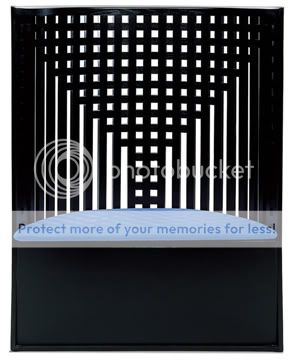
I started with a picture of a cool chair.

willow_lpsm.jpg


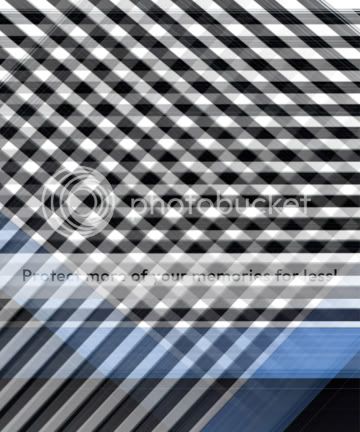
And 4 samples and layers later, I came up with this.

Checkscopy.jpg


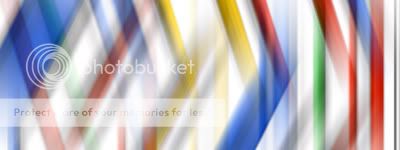
Here's what I came up with using the Google logo:

logo.gif


Googlething.jpg


Hopefully this will inspire you! Enjoy!
 
Tried but just got a line which i could move the corner and side boxes but the line stayed the same. Dont know enough about this program still to comprehend I guess!
smiley23.gif
 
I have had Photshop for years and have tried many times to use it and always fail miserably. get PO'd and forget it for months. Anyone know of a good online tutorial for complete computer idots on Photoshop one might look at? I would love to make all these fancy and fine labels you all put out.
 
I took a vertical section and lined it up with the A in Head. After pulling on the end transform boxes, I turned it by using the <--> curved handle thingie that shows up outside your transform box. Unfortunately the arrow thingie doesn't show up in a print screen! Here's what it should look like:

stripes.jpg
 
Joan very nice work looks like you found a hobby to the hobby, maybe hire out????


Wade how was the Gnarly Head? Just saw it today for the first timeat the liquor store on my payday shopping spree, didn't get it something else cought my eye.
 
Okay where the heck is the opacity setting as i have the first part down now.
 
Yep...it's just to the right of where is says "Normal" in the Layers palette.
 
Thanks Scott. I do this for fun! I have made a lot of labels for folks here. There's been no monetary reward but I've scored some really good wine and even better homemade jam!
smiley4.gif
 
Scott, the Gnarly head was pretty chewy which is descriptive for lots of tannins and i liked it. The other 2 (Joan, Appleman) I see it on Joan's screen but there were no tool bars on my screen except the basic tools on the left and it took awhile to find it. Joan, you have taught a dumb dog a new trick!
smiley36.gif
I dont know how to do a print screen though.
20080915_191116_j.jpg
 
That is the best payment, you doing something you like and in return they provide something they like.


Can't wait for the next installment of labels
 
Wade, that's wonderful!!! Just keep playing with it and see what you get!!

As for your layers palette...Go up to "Window" along the very top bar in Photoshop. There you will find all kinds of menus. "Tools" will have a check mark next to it. Select both "Layers" and History" and keep them out all the time.

Your History is one of the nos valuable things going! It's the place where you can easily go back to the place in your project before you screwed it up! (BTDT!!) I would be lost without it! I recommend you now go to "Edit" and down to "Preferences" and find History States. The default is 20. Change it to 999! Also know that when you close what you are working on, you lose your history but not your layers if you save the file as a PSD file. Always save it as a PSD file so you can go in and easily edit. If it's saved as a JPEG, all the layers are flattened and you get what you've got!

I quit now! I'm going to bed. The howling winds woke me up and kept me up!

I've decided your plaid looks like chocolate and I love it!
smiley32.gif
Maybe a background for your Chocolate Raspberry port???
smiley1.gif
 
I can't remember what version you have so some of these my not apply!

Here's a good explanation of the spot healing brush (band aid) tool.

http://quamut.com/quamut/photoshop_cs3_spot_healing_brush_tool

Here's the healing brush:

http://www.mediacollege.com/adobe/photoshop/tool/healing-brush.html

The patch tool:

http://photoshoptips.net/2005/09/09/patch-tool/

For the red eye removal tool...zoom way in on the eye by holding down the Alt key and rolling your scroll wheel on your mouse. With the red eye tool selected, click and drag a small box around just the red part in the eye. Release and the red is gone. If you don't like the way it looks you can use your History palette to go back a step, by going to Edit Undo, or use the shortcut...Ctrl and the letter Z.
 
Scott, Gnarly Head wines are one of my favorites. The Cab is bold, the merlot is mellow and the Zin is my favorite!!!
smiley4.gif
 

Latest posts

Back
Top