Questions and opinions

Winemaking Talk - Winemaking Forum

Help Support Winemaking Talk - Winemaking Forum:

This site may earn a commission from merchant affiliate links, including eBay, Amazon, and others.

RobertChartier

Junior Member
Joined
Dec 31, 2013
Messages
46
Reaction score
25
Hey all,
I've been making wine for a bit over a year now, and I'm running out of room.

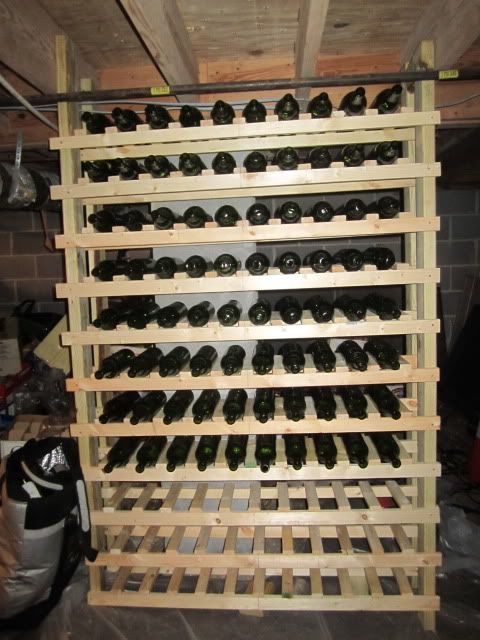
Earlier this year, I built a wine rack in my basement. Now, bear with me, at the time, the only real tools I had were a circular saw, a cordless electric drill and a tape measure. It was made almost entirely out of scrap lumber I had in the garage. It holds 12 1.5L bottles, and 88 750ml.

We've got a 144 count rack in the living room, and a 24 count rack in the hallway as well.

Unfortunately, 268 bottle capacity simply isn't enough. The racks are mostly full. I've got 9 cases aging in cases on a pallet in the basement, and 15 gallons in various stages of production right now. And I'm itching to start something new.

I'm looking for some ideas.

I've toyed with the ideas of either a ladder style rack, or the style I used in the pictures above, IE a shelf style.

My wife has suggested a diamond style, but I'm not sure which way to go.

I'm not looking for something pretty, it's going to be in the basement, after all. I'm more interested in STURDY, and something with more capacity for the buck.

I've looked at some of the online shops, and while they are certainly nice, at a price break of over $2 per bottle for storage space, I simply can't afford that.

Closet before-small.JPG

Shelves-small.JPG

Closet After-small.JPG

Shelf Close up-small.JPG
 
You need a couple of the Seville Wine Racks. Available from Amazon, Samsclub (online only). They will hold 30 bottles per shelf (safely) and with seven shelfs that is 210 bottles per rack and they look pretty good, especially filled!

Seville Wine Rack
 
Last edited by a moderator:
Here is what I made for my basement. Very much like yours. Each row holds 10 bottles. Next one I build will be big enough to hold two bottles per row, stacked on top of each other.


IMG_1069-1.jpg
 
Last edited:
All very good options. I live in an older home (circa 1927) and am not sure I have the space for a single wall sized space. I may end up building a couple if smaller units.
 
What kind of saw was used to make that. Any Plans?

Hi, Olusteebus,

Thanks for your interest. I have provided a bit more information in previous posts. I linked one of them above, and I have now quoted them below. I don't know if the pictures will show up here or not, but you can find them at the posts I quote here.

Well, here are some shots of the wine closet I have been talking about. Starting with the little alcove I started with, a few construction shots, and the more-or-less finished product.

I posted this recently elsewhere, but let me throw it out here now. The geometry I used, with "harlequin-patterned" diamonds, is the most efficient possible arrangement for stacking. I used 1x8's angled at 60 deg. from one another. I used a circular saw to make the angled cuts necessary. I sized the diamonds so that they can hold 16 bottles, which is pretty good for storing kits (with 30 bottles per kit). Let me know if you want any details.

I can offer a few drawings. The first one is an overview of the plan. I made each side of the diamond exactly 14". This makes it a little tight for fitting 16 Burgundy-style bottles. I think 14.5" would be better for that (but, of course, decreases efficiency if you have mostly Bordeaux-style bottles to store). The horizontal spacing between diamonds is the same (due to geometry) as the length of one of the sides, so, 14" in my case. The vertical spacing is, due to geometry, sqrt(3) times longer, so sqrt(3)*14 = 24.248" in my case. (I am not sure why the dimension in my drawing is slightly different -- just a drawing error, I think).

I used 1x8's and used a circular saw to cut slots, halfway across the 1x8, to accommodate the intersection. I set my circular saw at 30 deg., and zipped it just over halfway across the board. I then used a wood chisel to remove the material between the cuts. (I actually made four cuts, instead of just two, so that I could more easily chisel the excess wood out.) Technically, the width of the slots should be exactly 3/4" (the thickness of a 1x board), but I made it 1" to give a little slop for assembly. I was very grateful I had that slop when assembling!

I think if I had to do it over again, I may have used 1x10s, just to make the bottles sit farther back into the hole.

You have some choices regarding how to terminate the pieces, where they touch the outer walls. This bears a little thinking about. The second picture shows a close-up of the intersection, as well as the profile of various pieces of terminating boards. I chose to have the outer walls go through the exact center of the intersection, mostly to make the math easier on where the next board should be located. However, this means you have to make a funny, pointed cut on the end, which results from having a 60 deg. cut intersect a 30 deg cut.

I built an outer frame for the rack, and then assembled the boards within that frame as is shown above. The first boards went together well, but small errors accumulate as you assemble farther, making assembly difficult. I wound up having to trim the ends of some of the boards and open up the slots of some of those boards a bit. After I got the boards assembled, I used a power nailer (16 gauge) to nail the inner boards to the outer frame. I also put a nail through each intersection. After nailing, the rack was stout as could be.

That is everything I can think of for now. Ask me questions if there is anything that isn't clear!
 

Latest posts

Back
Top